The Pinter review: 5 things we learned brewing our own beer
Home brewing without (much) fuss.

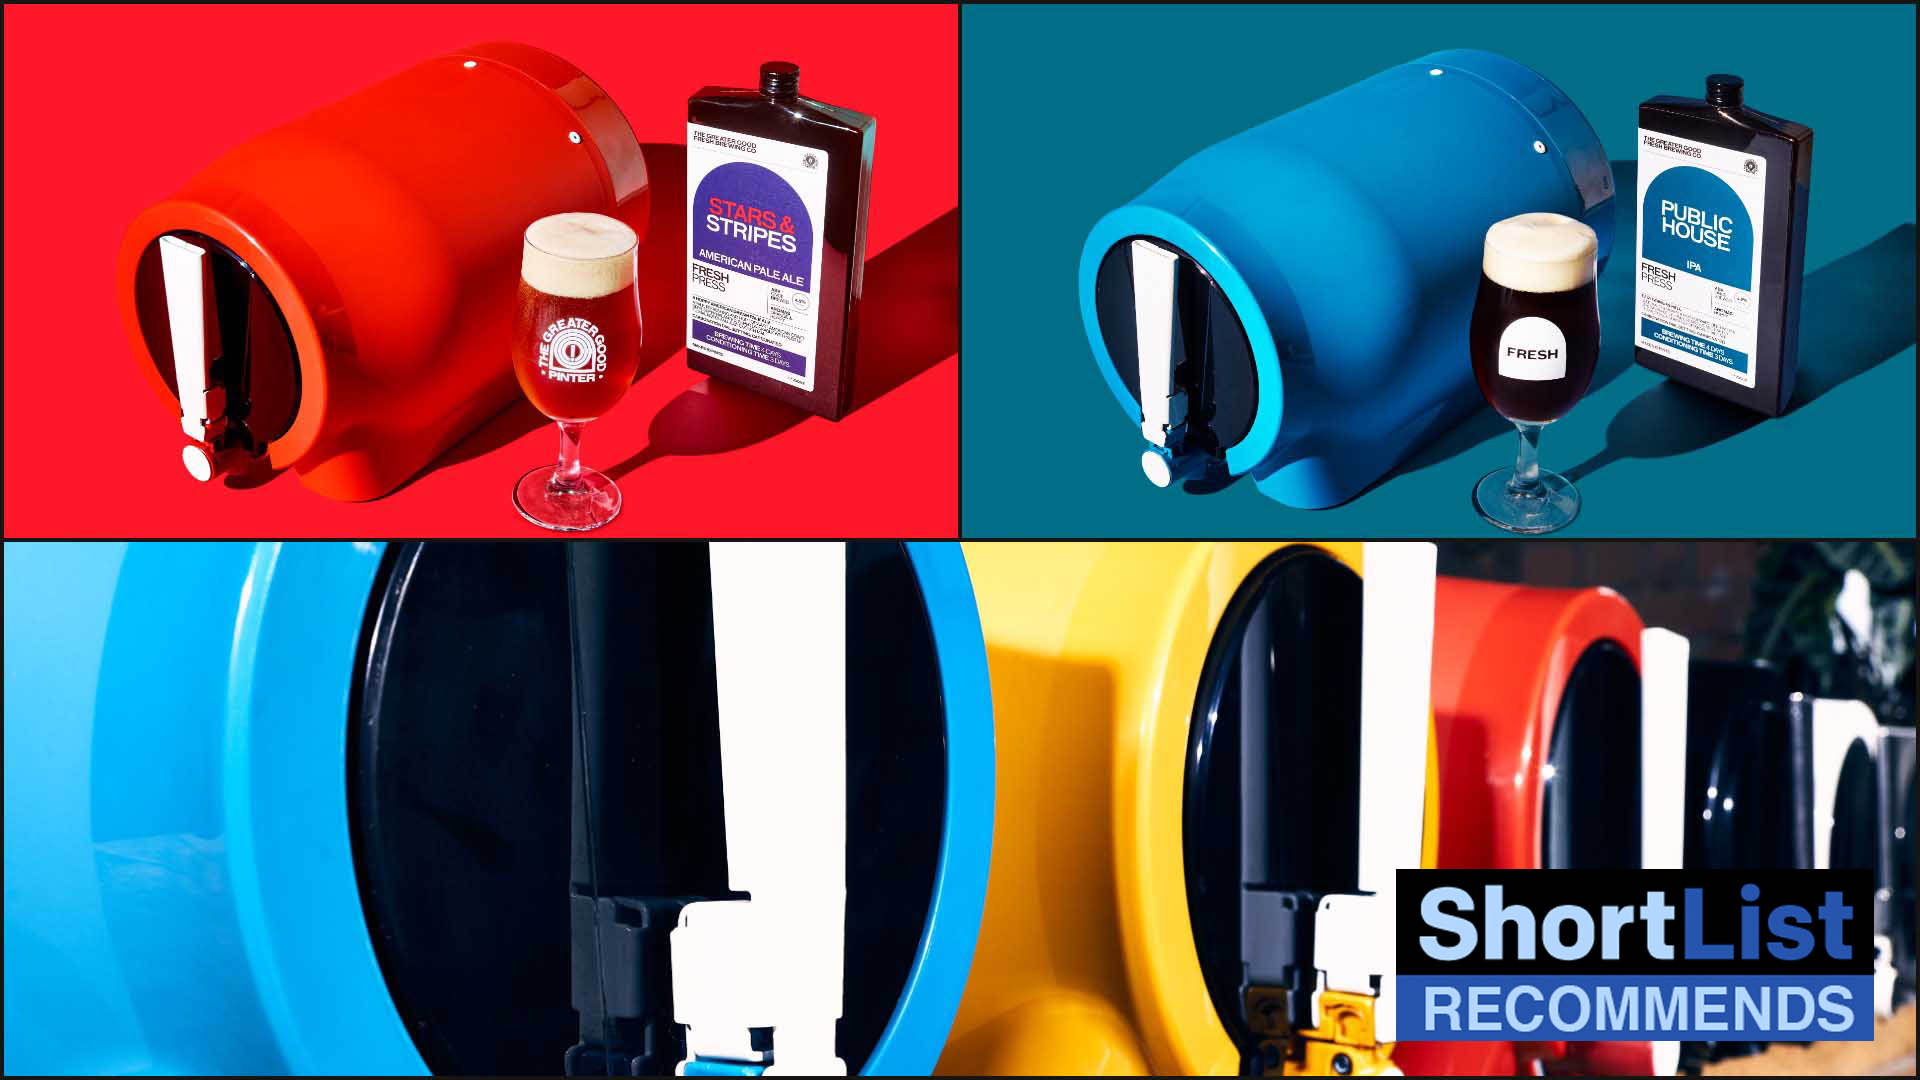
The Pinter is a brand-new beer brewing kit that takes the sting out of trying to brew ale in your own home. The idea is a great one: you buy the kit, which includes the Pinter barrel, Brewing Dock, some yeast, purifier and a Fresh Press pack.
The Fresh Press pack is alcohol-free (as the alcohol is created in the brewing process) so they can be sent to you through your letterbox, no signature needed - you obviously need to be 18 and over to sample the beer, though.
The Pinter has been created by the Greater Good Fresh Brewing Co and we were lucky enough to be one of the first to try it out.
Now, we like beer at ShortList, a lot. But we usually leave the brewing side of things up to the professionals. The last time we did try to brew a beer, it was a big success but that’s because the pros at Lagunitas guided us throughout the whole process - and they actually did the brewing part for us. We did choose grain and hops to use, though, honest!
We also have a best home brew kit guide, but that’s been compiled by our beer aficionado Chris Smith.
For this beer-brewing newbie, it was the first time I had tried to brew beer at home - because of this I wasn’t expecting big things. Which made me the ideal guinea pig: a debut brewer with a beer-making kit that boasts that “years of development and countless meticulous brewing sessions has meant the next chapter in the history of brewing is now a reality.” Fingers crossed I didn’t manage to ruin that next chapter, then.
Here are 5 things to know about The Pinter…
Get exclusive shortlists, celebrity interviews and the best deals on the products you care about, straight to your inbox.
- The best craft beers revealed
- The best American beers, ranked
1. The Pinter is a smart-looking beer maker
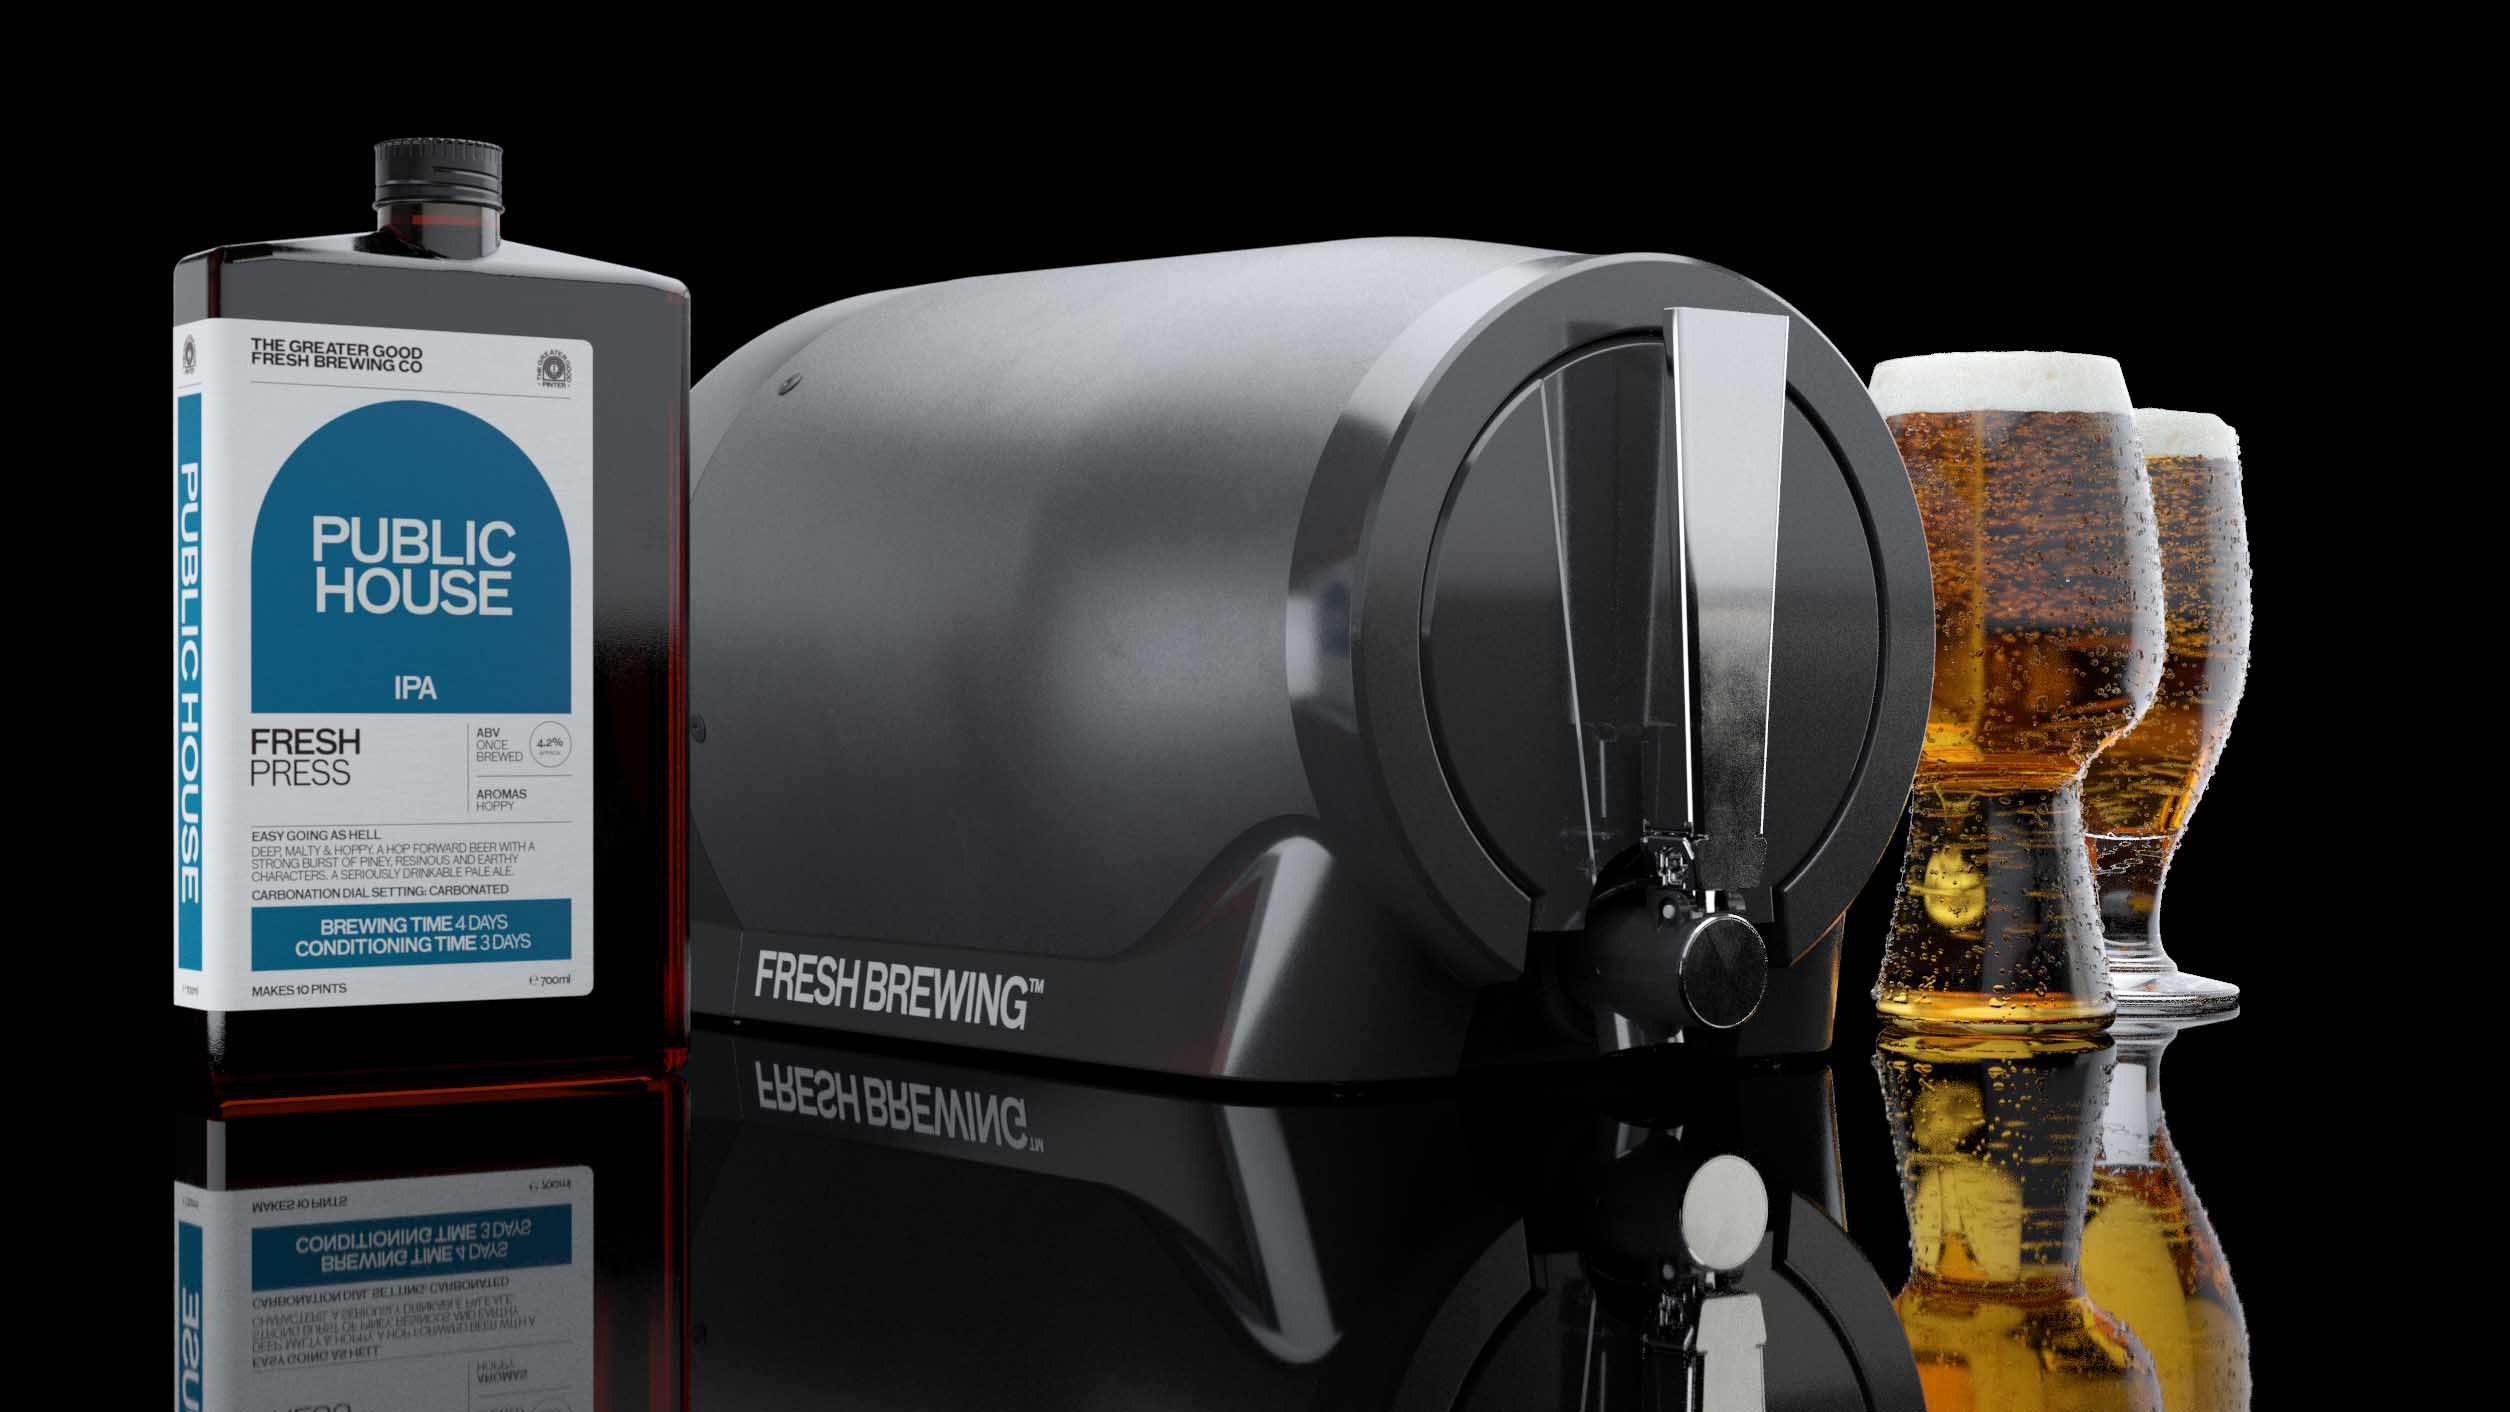
The main part of The Pinter kit is the Pinter itself, as well as the Brewing Dock - and it is a great-looking thing. Its makers have gone for colour to make the dock stand out, with a number of variants available.
We opted for a True Blue Pinter, but there are six colours in total, including: Tropical Yellow, Hot Red and Slate Grey. Obviously the colour doesn’t change anything about the brewing process but if this thing is going to be a regular fixture in your kitchen then you will want it to fit in.
It all comes in sustainable packaging, too, which is a big plus point, and there’s a nice note on the side that says: One Pinter pack replaces 17 330ml cans of glass bottles, halving your carbon footprint. It also says that by the end of 2020, the company is hoping to be carbon neutral.
In our kit we got two Pinter Packs: Waltham Forest Dark Fruit Cider and Public House IPA. All of this costs £75 and if you want subsequent packs then they are £12 (as well as monthly subscription options).
2. Brewing instructions are easy to follow - just be prepared
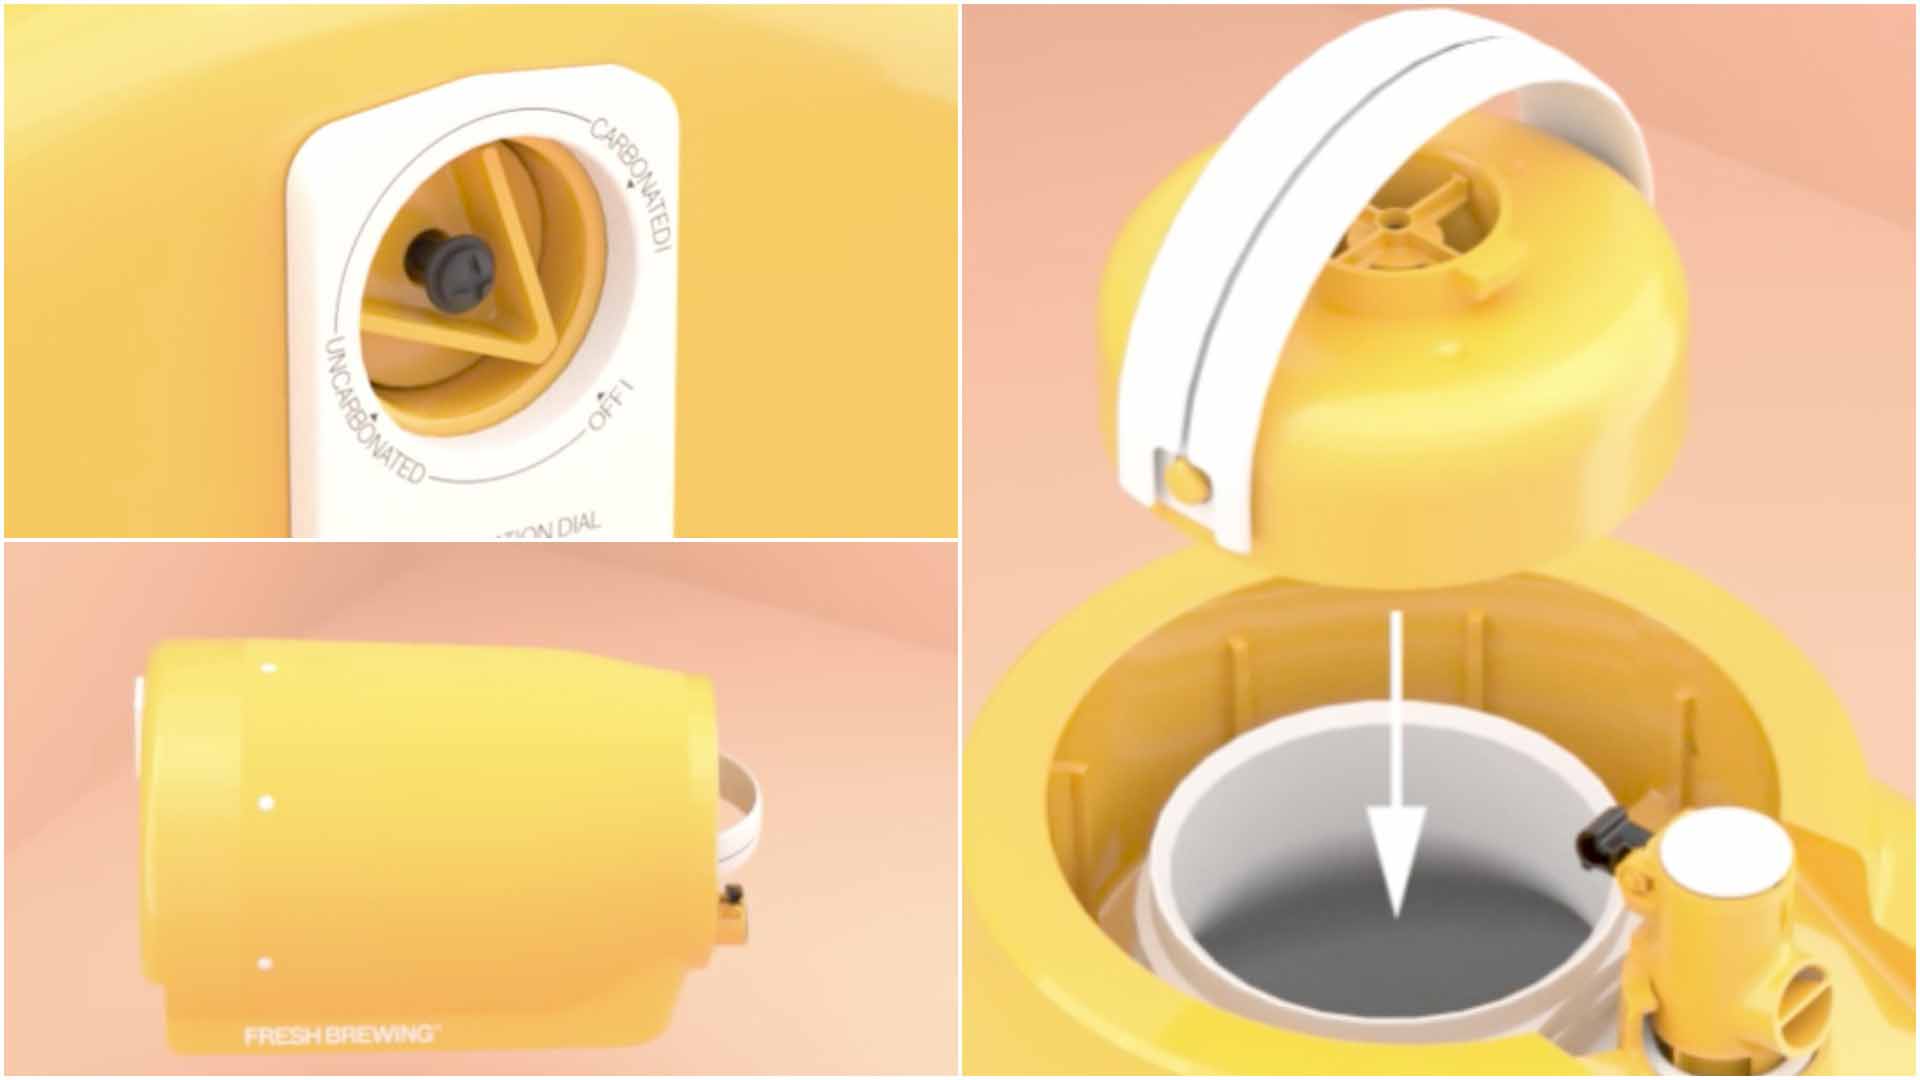
To help with cutting down on the paper, instructions are done through the Greater Good Fresh Brewing Co site and accessible through a QR code (something we are all used to now, if you have tried to get into anywhere lately).
This is a nice idea as it means that everything is done through a number of animated videos. These can be replayed as many times as you need - and, if you are anything like me, you will have to play them a few times.
3. The first time brewing will take time and is fiddly in places
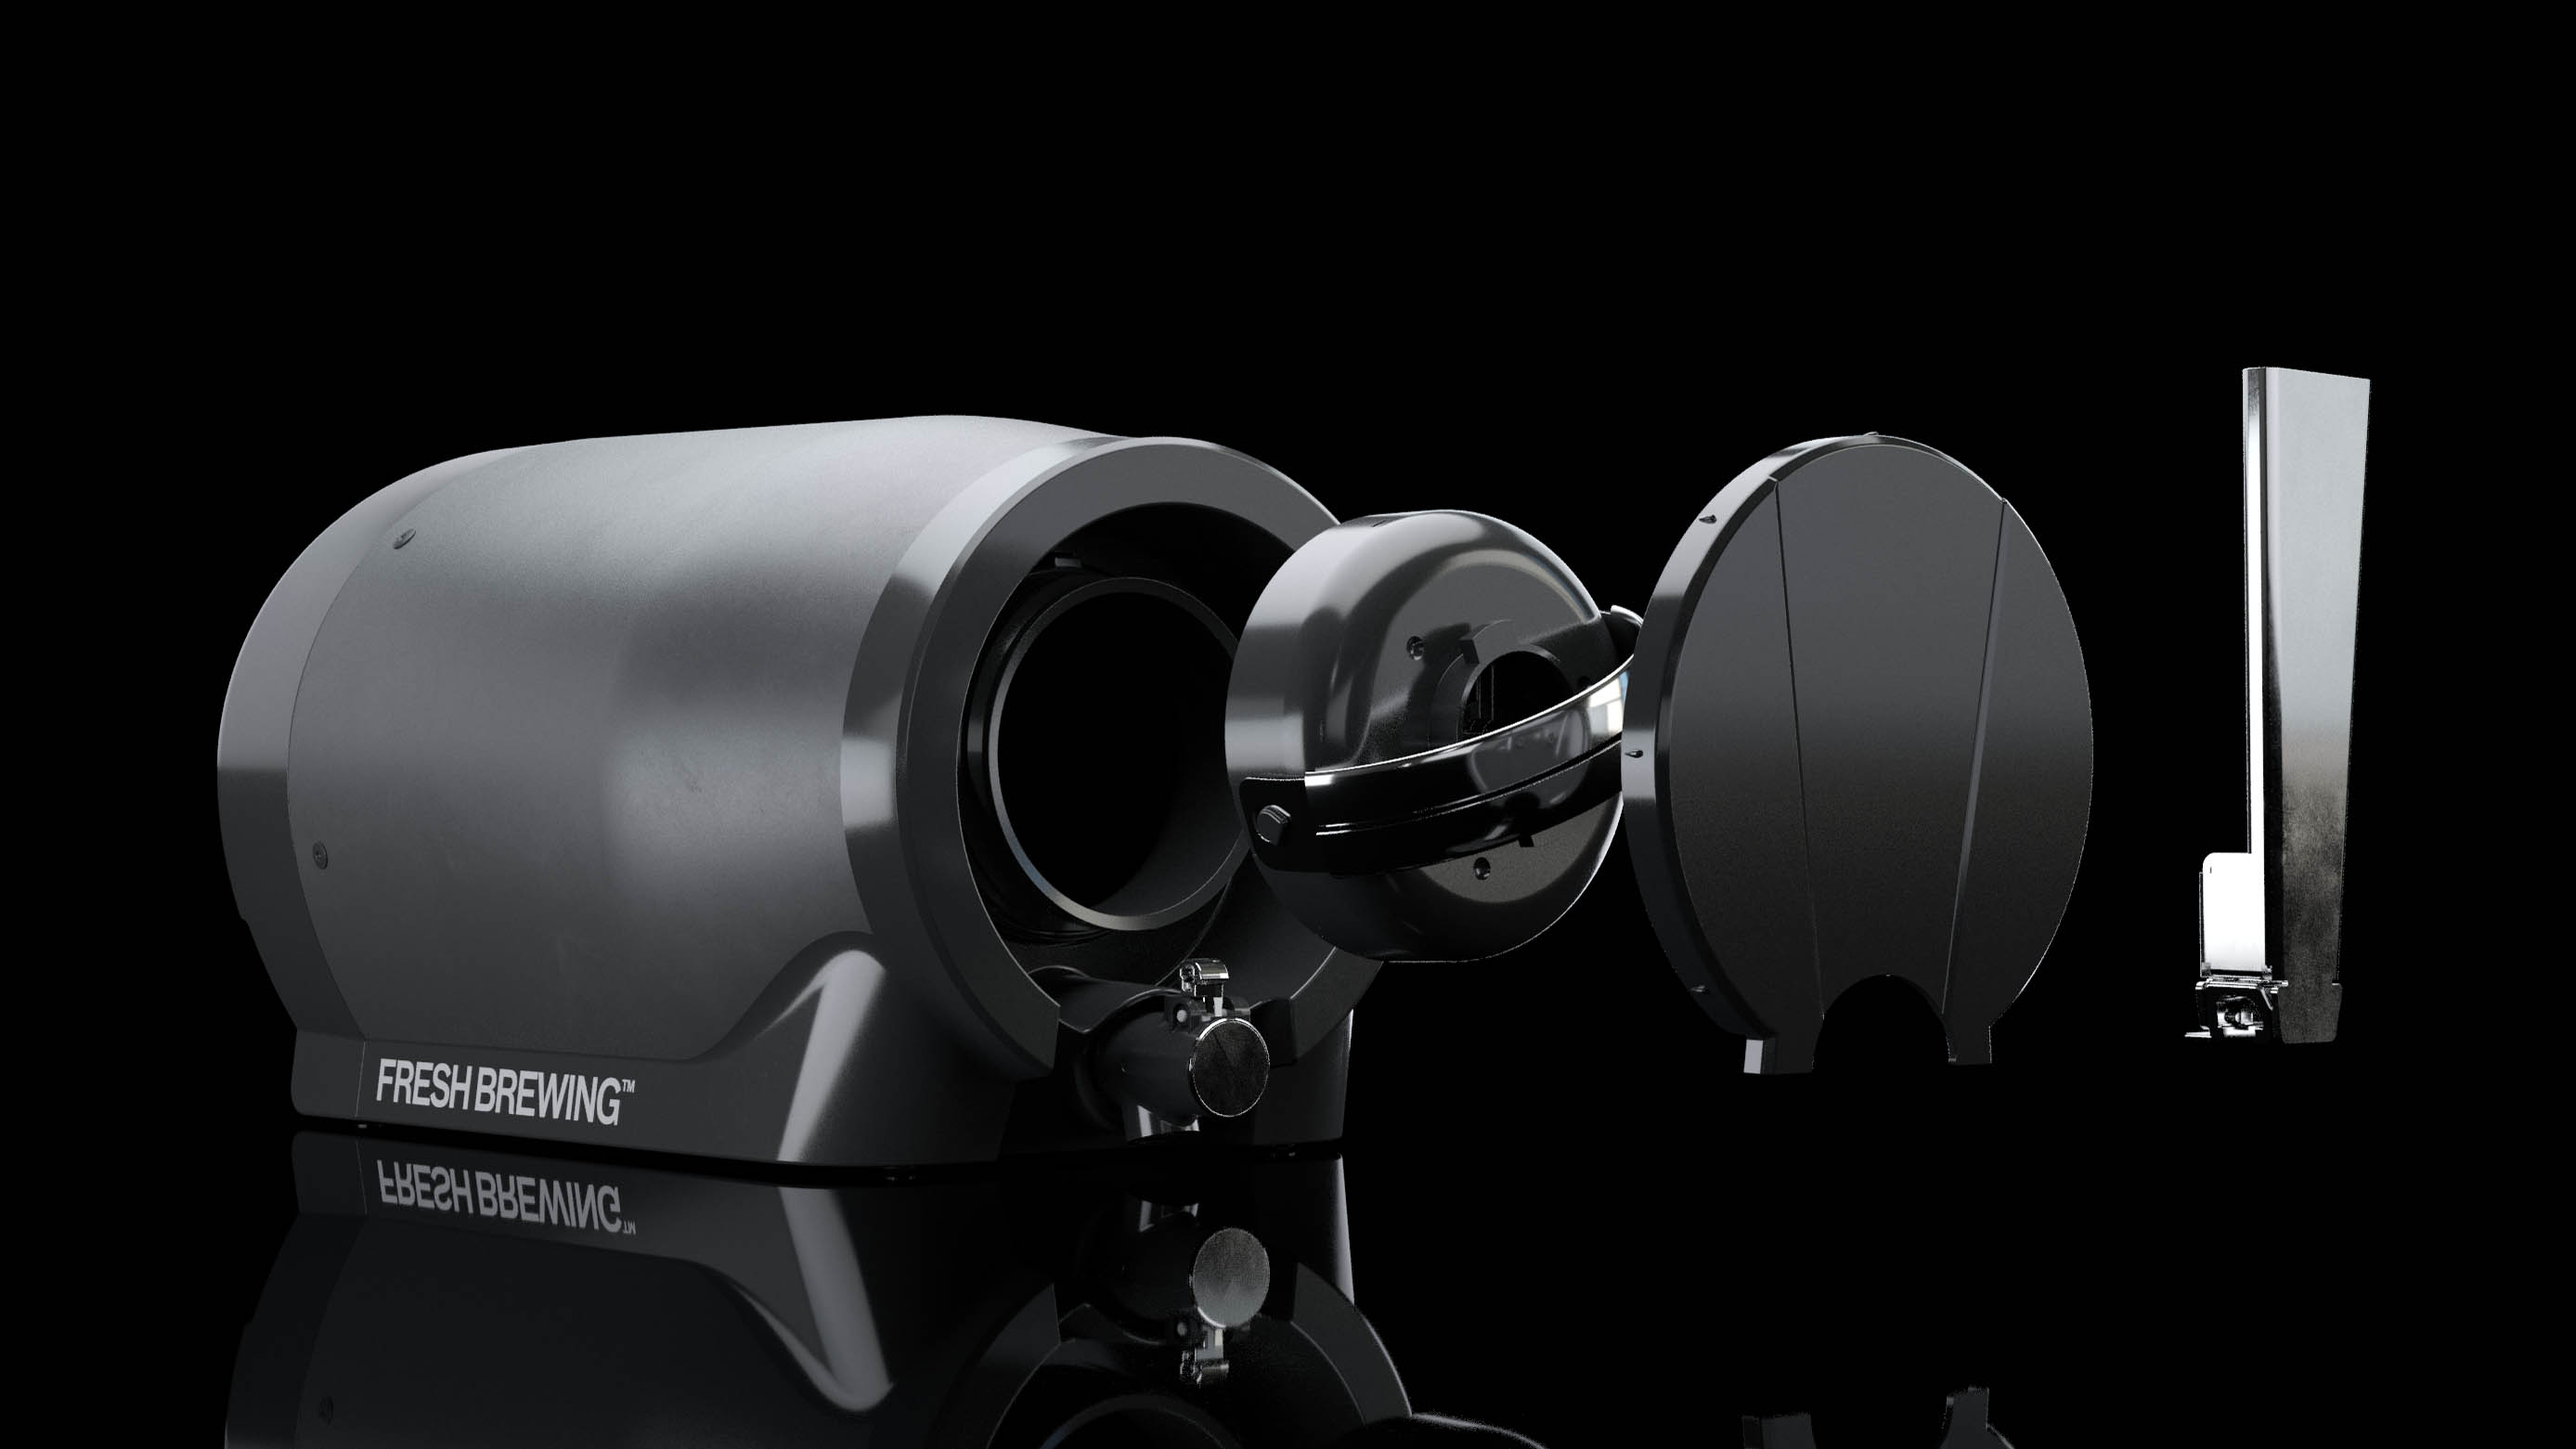
Now, when I said the instructions were easy to follow that doesn’t mean that everything is simple - it takes a little getting used to, especially if you haven’t brewed before. The first mistake I made was underestimating the size of the Pinter.
Up until putting water in, it was fairly simple - the dock is assembled as it would be if you were pouring pints, so you have to take the front plate and the tap handle off. There’s a cap underneath this which is a little stiff to take off.
Here you fill it up with water (making sure the carbonation switch is turned to off) to the fill cap. It says use hot tap water and our obedient brain tried to do just that - turns out getting the brewer under a tap will not work, unless your basin is as big as a bath. We half-thought of actually taking the thing upstairs and fill it in the bath then realised that was also ridiculous. Instead we used our kettle, filling it up with hot tap water, and was slightly embarrassed that we didn’t do that straight away.
Once it’s filled with water, chuck in the purifier potion, close the cap up and then give everything a shake - given the size of the dock, it certainly gets the muscles working.
Purification is key to making sure the beer brews properly and it includes making sure the brewing dock is purified. Again, this took a little bit of practise. With the water in The Pinter you have to align the Brewing Dock - it took a few attempts to do this and even when it was done I was a little nervous that it wasn’t on properly. I flipped it over, though, and the water flowed through and not on to the floor. And that’s the purifying done - detach the dock and put the handle on and you are away to go.
I flipped the dial to carbonate (as that’s what the instructions said), filled the thing with cold water, added in the gloopy Fresh Press and the yeast and once again had a bit of an argument with the cap but got it on there in the end. Another shake and my arms are beginning to feel like Popeye’s. Then I attached the dock once more (still a bit fiddly) and checked how long the thing should brew for.
4. Make sure you have room for a brew
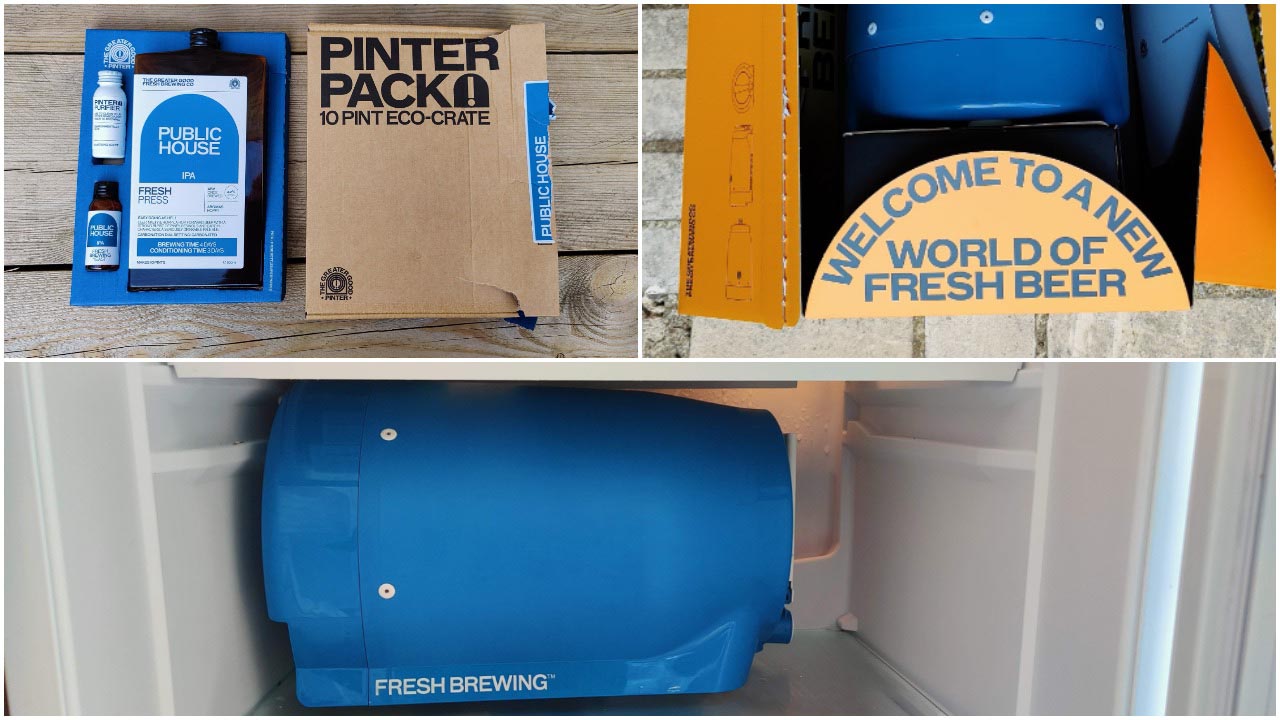
Four days. That’s how long we had to wait for the Public House IPA - and you need to make sure that it’s somewhere where it won’t be disturbed. Given all of the above took under an hour, and most home kits will mean weeks of waiting, it’s a fantastic, simple process to create your own beer.
Yes, a few bits of it are tricky but I am putting that down to first-time nerves - it certainly wasn’t the instructions, they were clear. It was more making sure I was ready to actually complete the steps.
And this happened again when it came to Conditioning. In total, it takes around a week to make the brew as you give it four days to do its thing then have to pop it into the fridge for the last three days (timings change depending on what you are brewing).
Now, a word of warning: The Pinter is sizeable - it’s a thing that holds 10 pints of liquid. So, when you have to put it in the fridge - after taking the Brewing Dock off and cleaning off any residue - it’s probably best to time it when your fridge is a little empty.
Unless you are blessed with an American style fridge, you are going to have to carve out some serious space for this thing. I managed it but had to sacrifice some milk and yoghurt in the process. The sacrifice is worth it.
5. The taste test makes it all worth it
A week goes by and by sheer chance, ahem, my first pint from The Pinter is ready on my birthday. One last look at the instructions and remembering to turn the carbonation dial to off when pouring, something that actually resembles beer comes out and I am utterly impressed.
A quick taste and it’s golden, hoppy and fresh, just like the description for Public House IPA.
There is something fulfilling about brewing beer at home - yes, the stabilisers are very much on with The Pinter but that’s the point of the thing. It takes the notoriously difficult process of making a home brew and streamlines it, leaving enough to do to make you feel like you are still a key part of the process.
The Pinter costs £75 and comes with two 10-pint Pinter packs.
- The best beer delivery services, ranked
- The best real ale: traditional beer, ranked

As Content Director of Shortlist, Marc likes nothing more than to compile endless lists of an evening by candlelight. He started out life as a movie writer for numerous (now defunct) magazines and soon found himself online - editing a gaggle of gadget sites, including TechRadar, Digital Camera World and Tom's Guide UK. At Shortlist you'll find him mostly writing about movies and tech, so no change there then.